

A velvet bow can change plain hair in about ten seconds. It adds colour, softness, and a clear holiday note, without asking you to learn a new braid or spend an hour with a curling iron first.
These velvet bow holiday hairstyles cover a lot of ground. Some hair is slicked into buns, some falls in loose waves or curls, and some is braided, twisted, or pulled into ponytails. Partings shift from deep side parts to clean centre parts, and the bows range from tiny one inch clips to oversized statement pieces in black, red, burgundy, green, navy, ivory, and brown.
Every idea below comes with its own photo, a note on who it suits, and one practical tip, so you can compare like with like. Start with the hair shape you like most, then check the length it needs, then save two or three favourites to try against your outfits.
Work through the list with your December calendar open, and match each event to a bow.
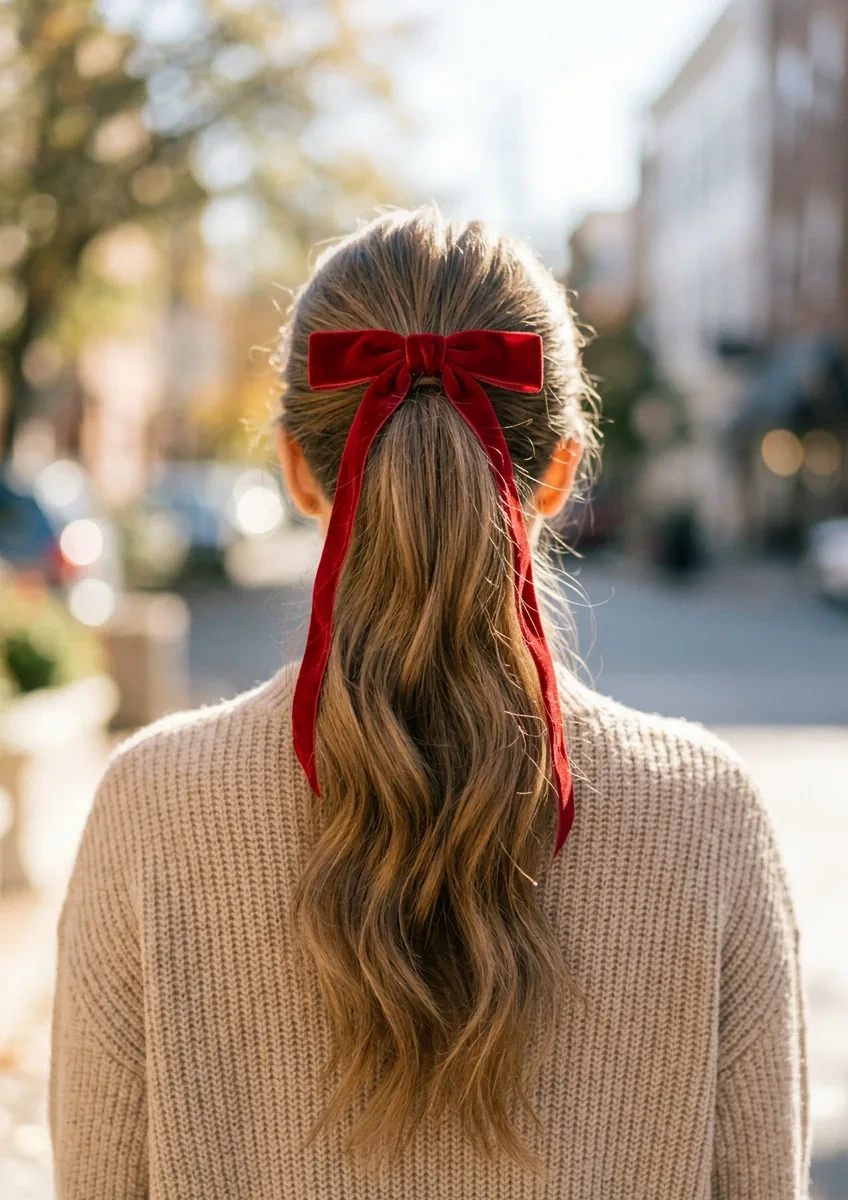
1. High Ponytail With Long Red Bow Tails
 Pin
A high ponytail keeps the hair lifted and clean at the crown, while the lengths fall in loose, brushed waves. The red velvet bow sits at the base, with two long tails running down the ponytail, so the colour moves as the hair moves.
It flatters oval and heart shaped faces because the height adds length, and it suits medium to thick hair that can hold a high gather without slipping. Fine hair can wear it too, with a thicker elastic underneath. Tie the bow after the ponytail is secure, not instead of an elastic. A velvet bow alone will not hold the weight, and the tails will pull it down within the hour.
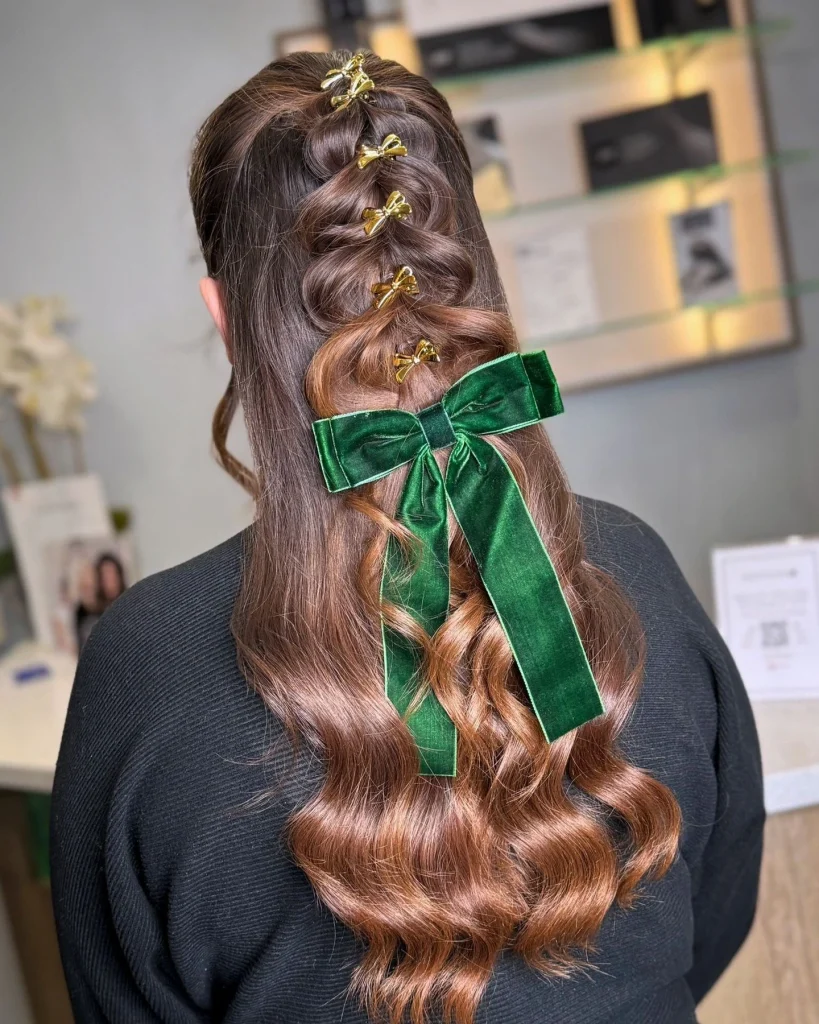
2. Gathered Waves With Emerald Bow and Gold Pins
 Pin
Long, glossy brown hair is gathered through the centre in soft, stacked waves, with small gold bow pins placed in a line down the middle. A large emerald velvet bow sits lower, where the gathered section meets the loose lengths.
That mix of smooth sides and a fuller centre suits round faces, since the height through the middle balances width. It works best on long hair with natural wave, or waves added with a wide iron. Recreate the centre pattern with a pull through braid or loose twists, then add the pins last. Fixing the velvet bow first makes the centre section hard to adjust, and it can crush the velvet pile.
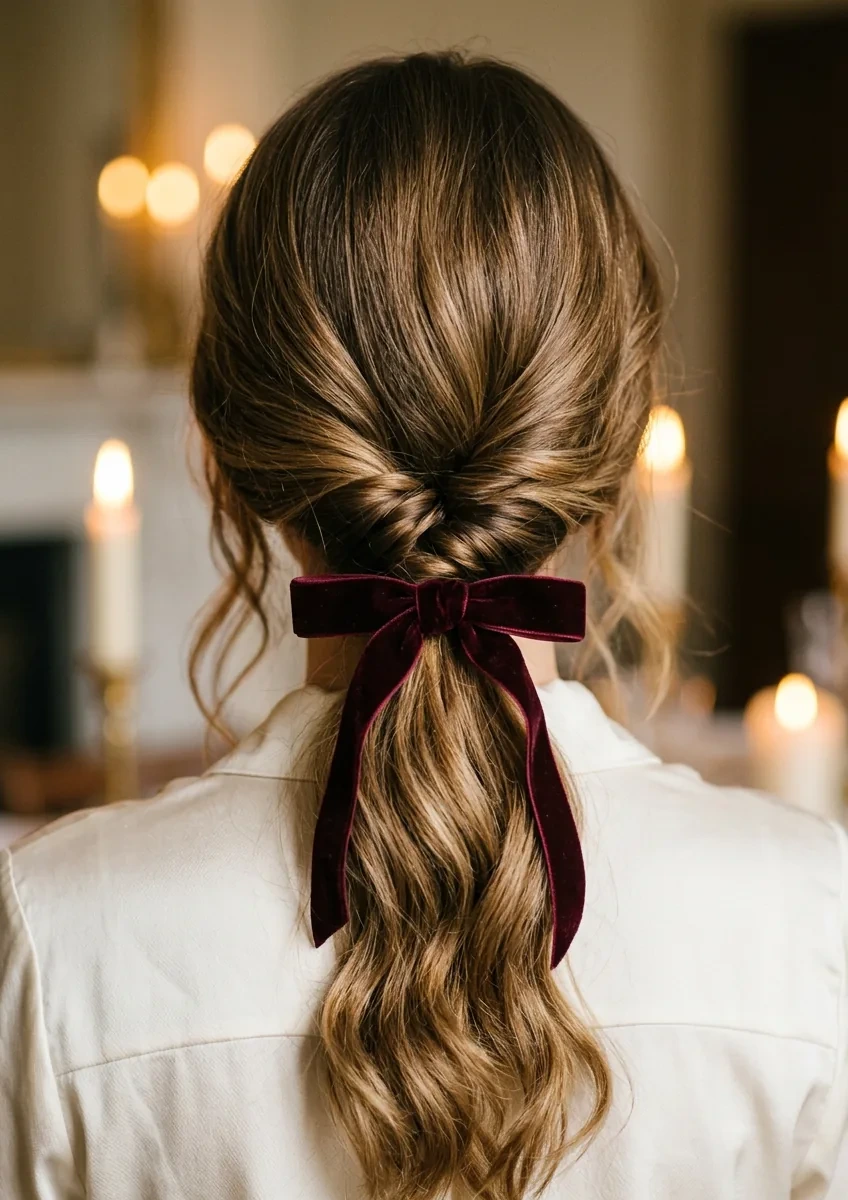
3. Low Twisted Ponytail With Burgundy Bow
 Pin
Want one style that stays neat from the first song to the last photo? A low twisted ponytail is gathered at the nape, the tail twisted once for texture, and a medium burgundy bow is tied at the base. Soft pieces left around the face keep it gentle rather than severe.
The low placement flatters long and oval faces, and a nape gather suits medium and long hair that feels heavy in higher styles. Curly hair works well here if you twist the tail loosely and let the pattern show. Twist before you secure the elastic, not after. Twisting a finished ponytail strains the base, and it loosens the bow by midday.
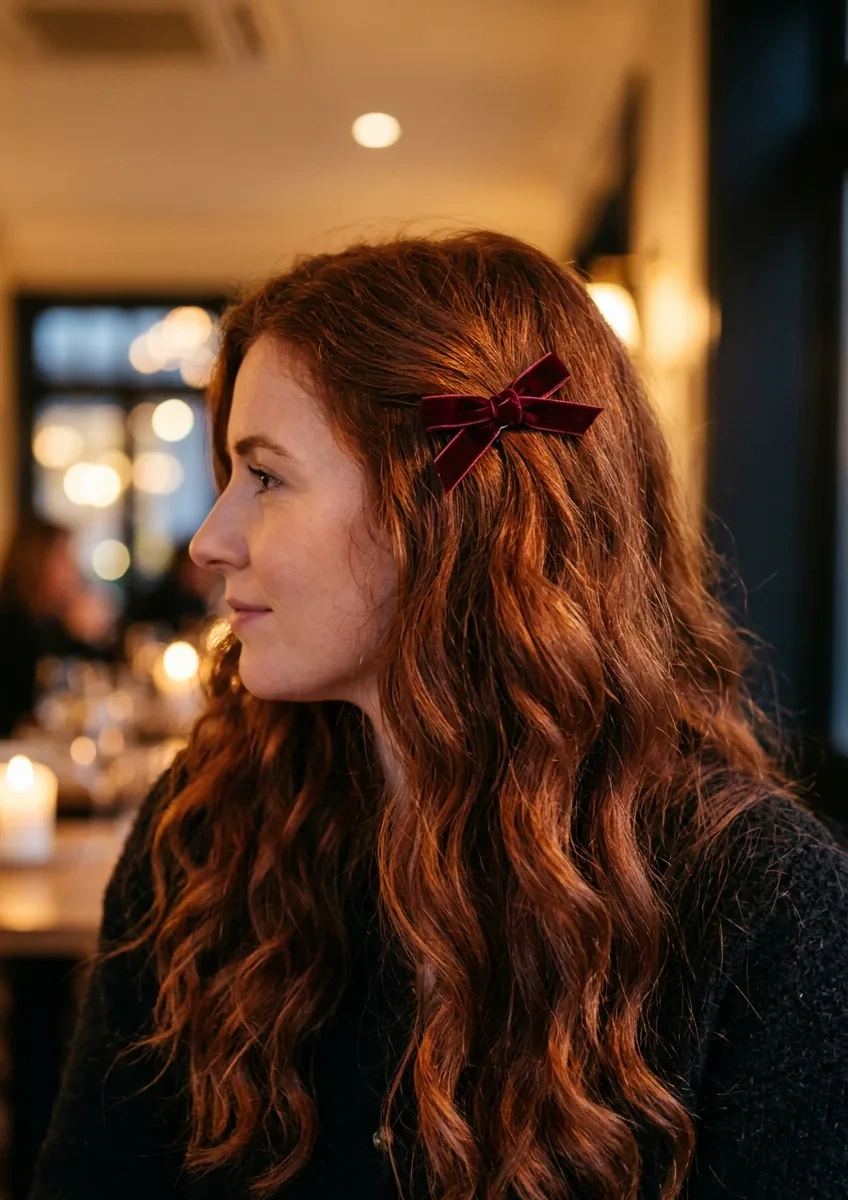
4. Loose Waves With a Side Burgundy Bow
 Pin
Loose waves carry this look. The hair is curled in large sections away from the face, then raked through with fingers so the waves stay soft, and one side is tucked back with a small burgundy bow clipped just above the ear. That single sided placement feels romantic without covering both sides of the face.
It flatters most face shapes, and the side tuck is kind on fine hair because it does not need much volume to read clearly. Wavy and straight hair both hold it well. Backcomb the small section under the clip, just slightly. A bow clipped onto smooth, flat hair tends to slide down as the waves relax.
5. Pulled Back Hair With a Large Red Bow
 Pin
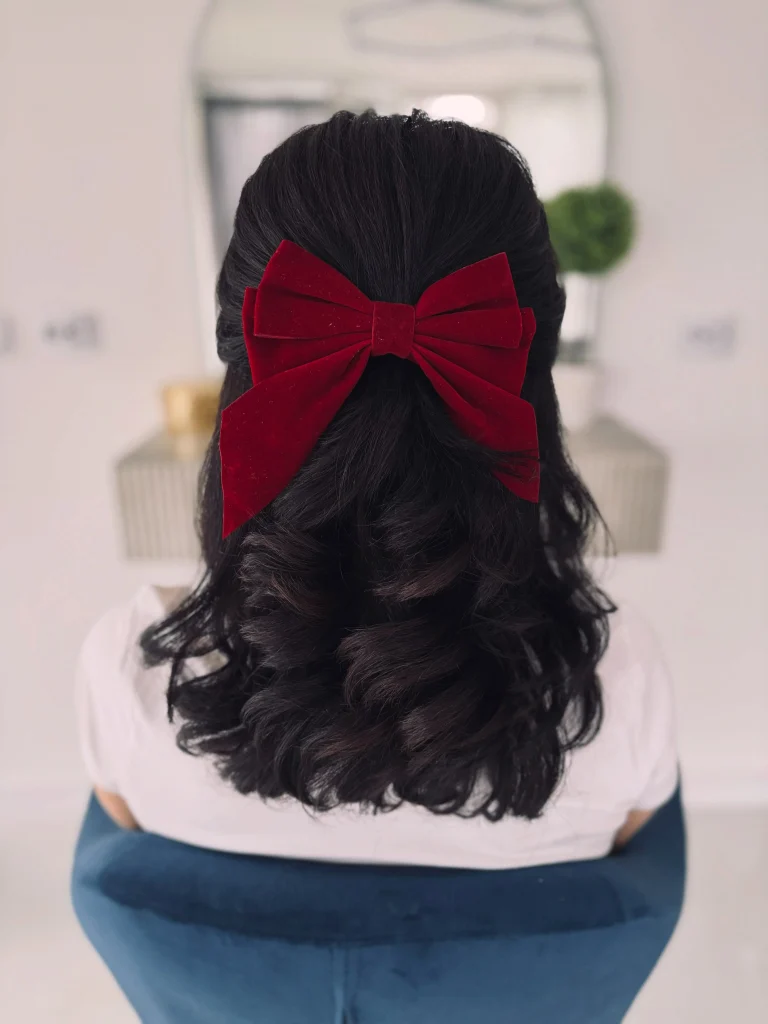
Dark hair is brushed back smoothly from the crown and pulled together at the back, where a large red velvet bow covers the join. The bow is wide and fairly flat, with neat, shorter tails, so it reads bold from a distance and tidy up close.
The smooth top flatters oval and longer faces, and the strong colour contrast suits dark brown and black hair especially well. Straight hair, or wavy hair blown smooth, shows the clean gather best. Brush the crown smooth before you clip the bow in place, and pin the underlying gather first. A large bow clipped onto loose hair will tilt to one side.
6. Sleek High Bun With Oversized Black Bow
 Pin
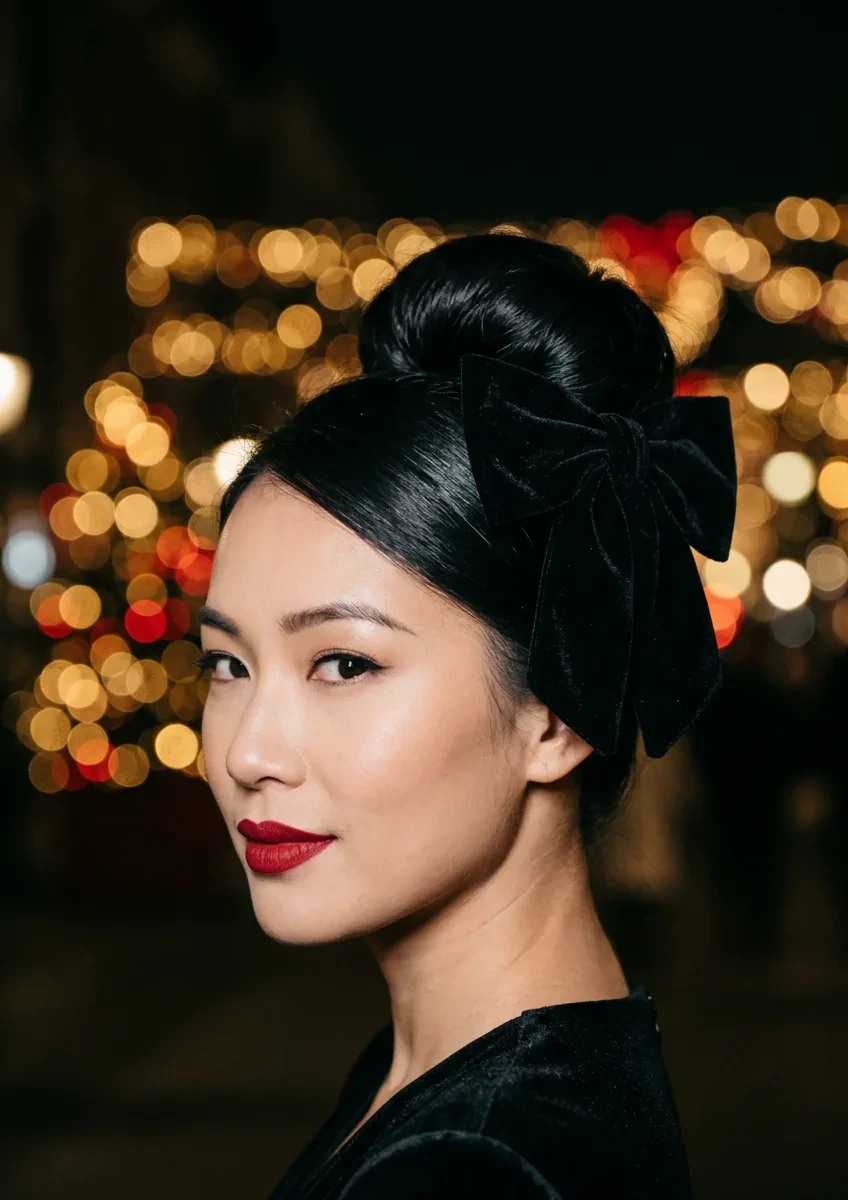
Everything here is slicked back. The hair is smoothed tight into a high bun, and an oversized black velvet bow sits below or beside it as the single statement. With no loose pieces left out, the contrast between the glossy bun and the matte velvet does all the work.
This flatters oval and angular faces, since the clean lines show bone structure, and it suits medium to long hair that can be gathered fully. Thick hair may need the bun pinned in two sections so it sits flat. Use at least four pins for the bow, crossed in an X. If midnight finds your bow still sitting straight, you will feel every bit as polished as you did at eight. For more polished bun variations, explore these easy bun hairstyles.
7. Smooth Half Up With a Black Bow
 Pin
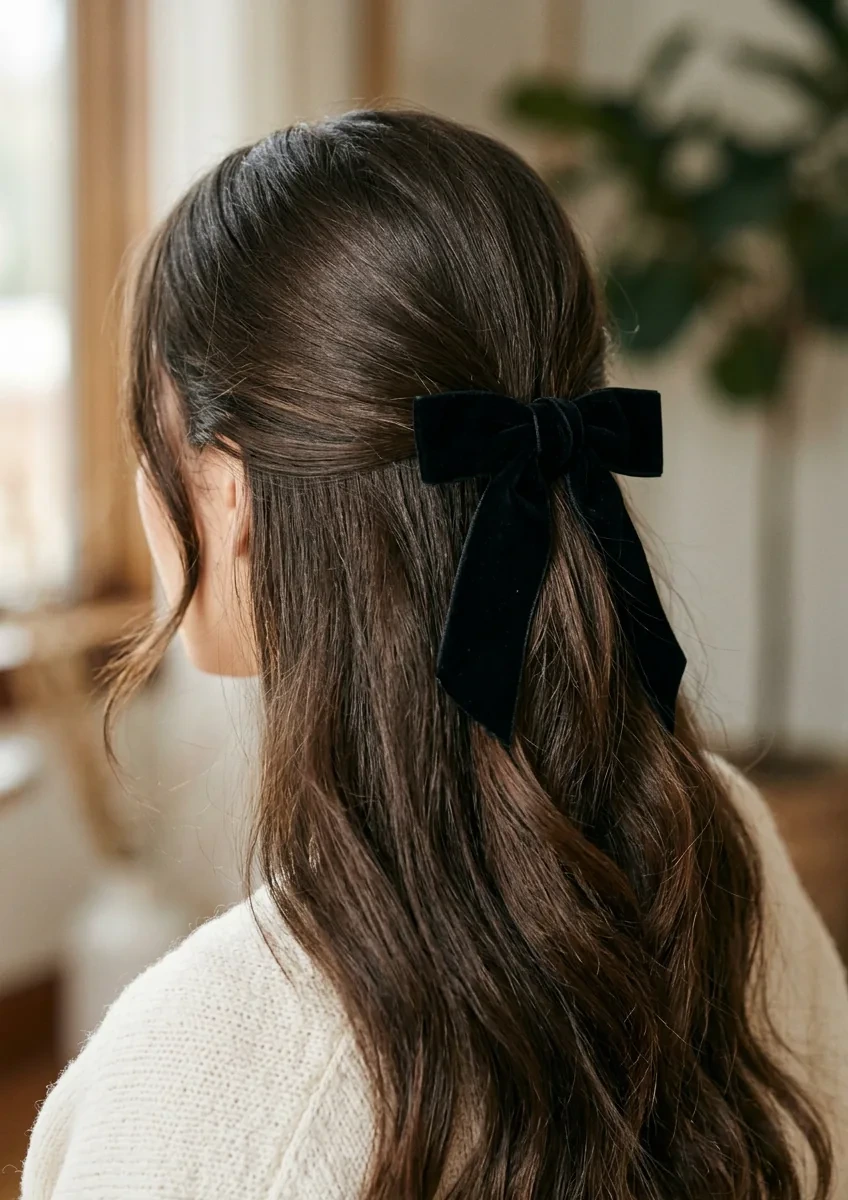
Need one style that reads polished at work and still feels festive after hours? The top section is gathered from temple to temple into a low, smooth half up, twisted once, and pinned at the crown with a medium black bow. The crown stays flat, with no teasing, and the lengths fall clean below the shoulders. A deep side parting makes the finish feel more grown up.
It suits medium and long hair, straight or lightly waved, and it is forgiving on fine hair because the gathered section is small. Add texture spray to the top section before pinning if your hair is slippery. Smooth, untreated hair lets the pin slide slowly all evening.
8. Half Up Hair With a Large Red Bow
 Pin
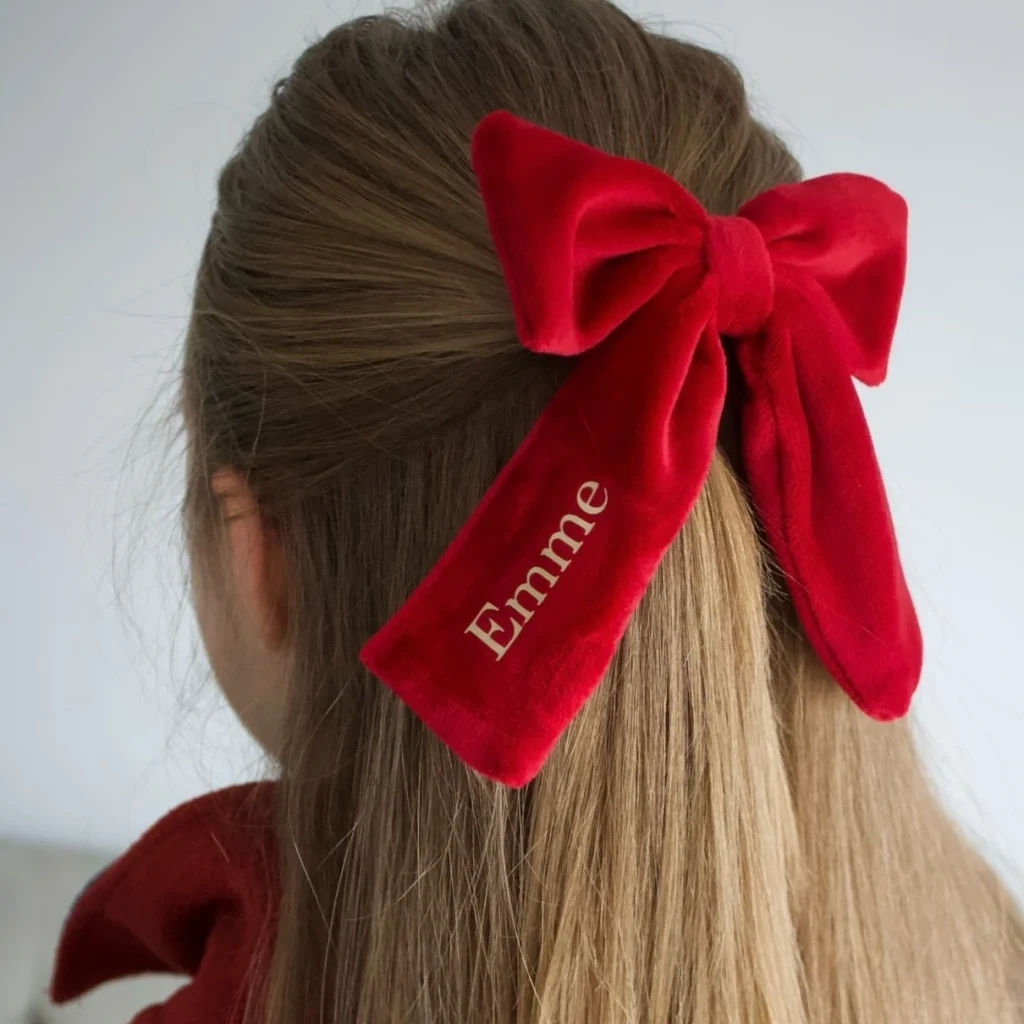
Light brown hair is swept back into a half up gather, and a large red velvet bow sits high at the crown. The hair above the bow stays smooth and close, which lets the bow keep its full, rounded shape instead of sinking into volume. One tail on this bow is personalised, a small detail that works well for gifts and family photos.
The style suits long hair best, where the tails can fall past the gather and mix with the lengths. It flatters round faces too, because the bow adds height at the back of the crown. Choose a bow with a firm centre knot for this placement. A soft, floppy bow folds under its own weight when it sits this high.
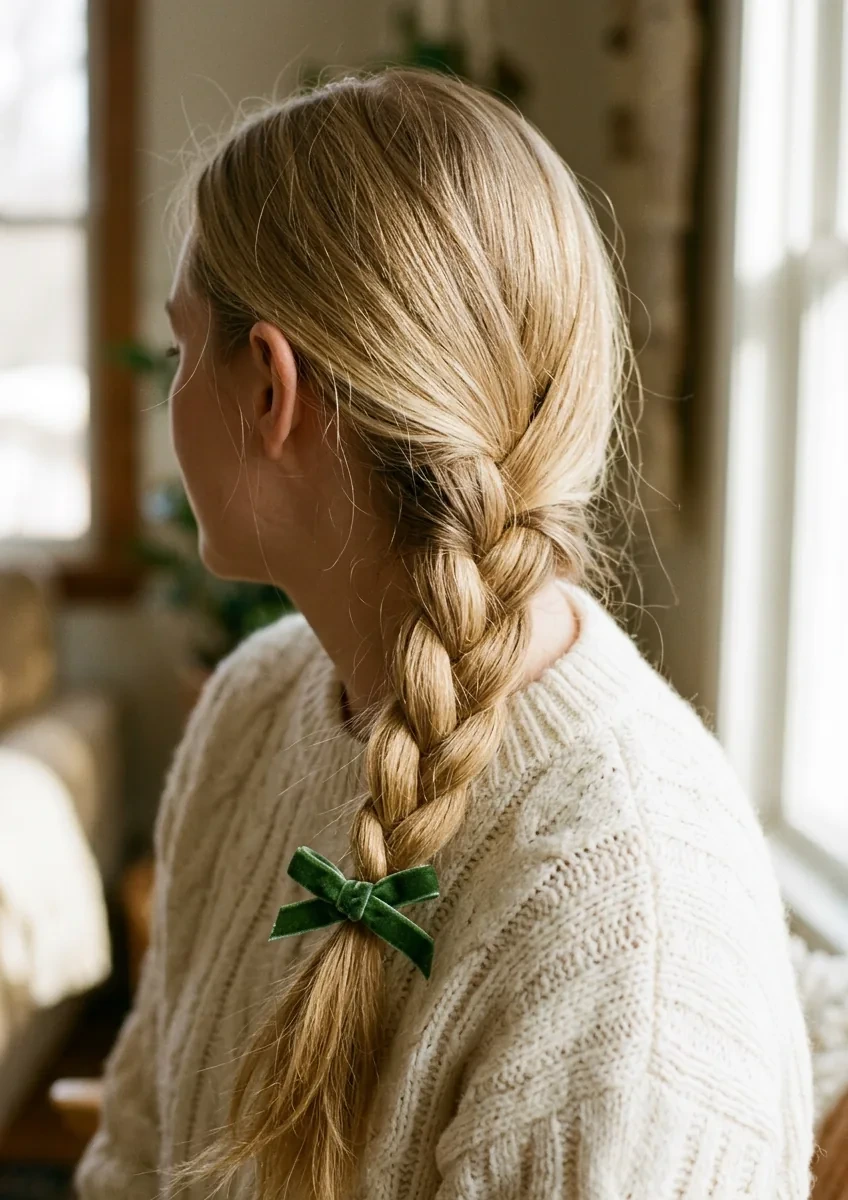
9. Loose Side Braid With a Green Bow
 Pin
A loose three strand braid worn over one shoulder does the work here, finished with a small green velvet bow tied at the very end, over the elastic. The braid is loosened by tugging each section gently, so it looks full and soft rather than tight. Wispy layers escaping at the front are part of the charm, not a mistake to fix.
It suits medium to long hair, and it flatters softer, rounder faces because the shoulder placement draws the eye downward. Wavy hair holds a loose braid best, since the texture grips. Braid the night before and add the bow in the morning. Sleeping in the braid gives you the relaxed texture without any heat styling.
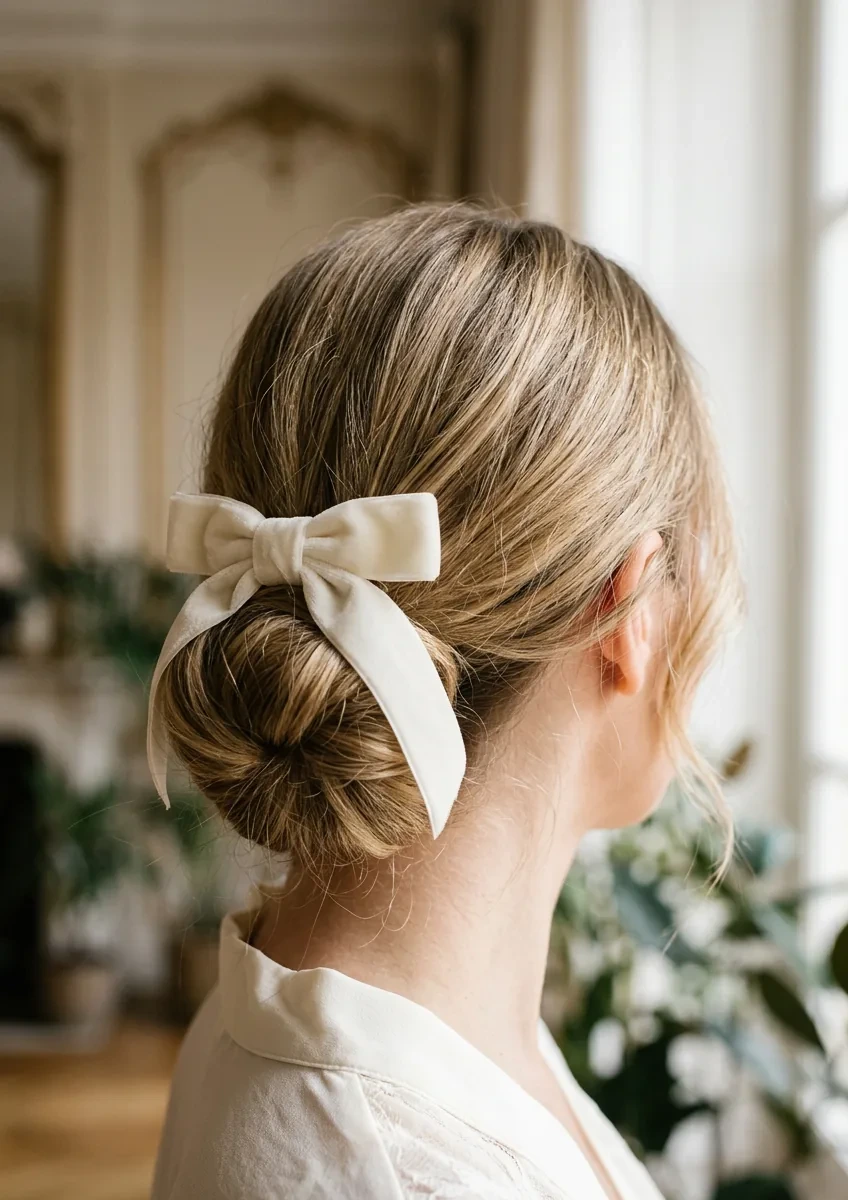
10. Low Chignon With an Ivory Bow
 Pin
Worried a bun will look bridal at a winter wedding? Placement solves it. The hair is parted low on one side, smoothed into a chignon at the nape, and a medium ivory bow is pinned about an inch above the bun, never on top of it. That small gap keeps the style formal and grown up.
It flatters oval and heart shaped faces, and it suits medium hair as well as long hair, since a shorter length can be tucked into a low roll instead of a full bun. If your hair is thick, build the chignon from two twisted sections pinned separately. It lies flatter that way, and the bow sits level above it. For a wedding-ready take on this low bun, see these bridal bun ideas.
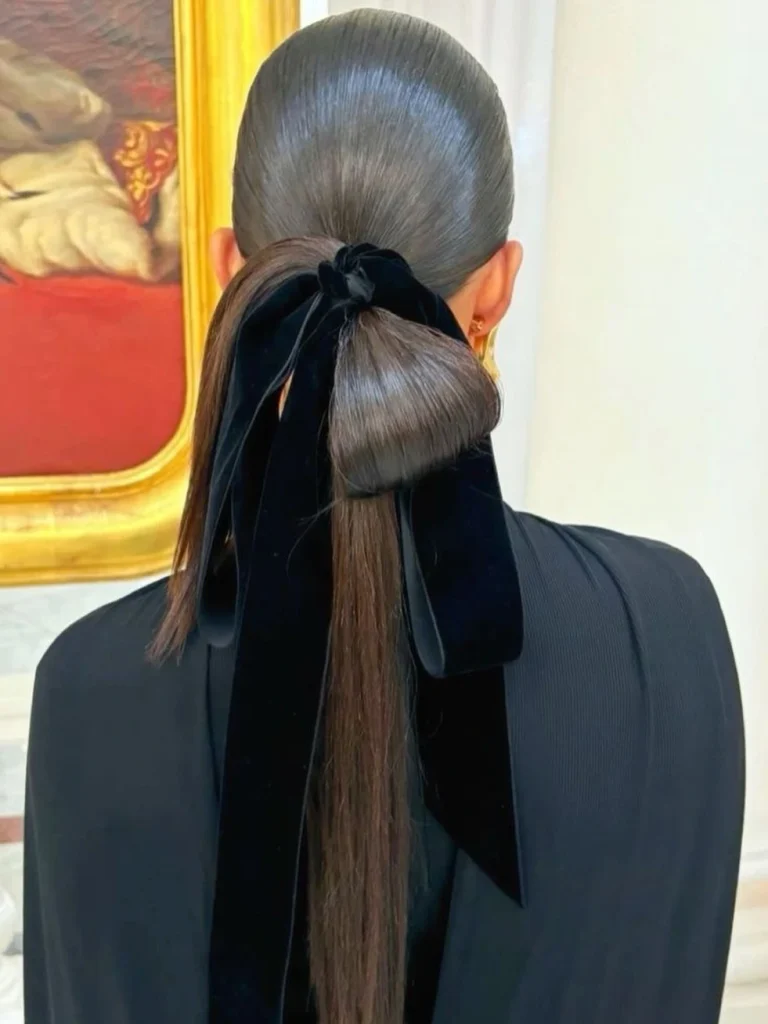
11. Sleek Low Ponytail With a Black Ribbon Bow
 Pin
This ponytail is all about control. Dark brown hair is slicked straight back with no parting showing, gathered low, and tied with a black velvet ribbon bow at the base. The tail stays smooth and close, so the shine of the hair and the softness of the velvet contrast cleanly against each other.
That sleek finish flatters oval and heart shaped faces, and it suits straight hair, or hair that blow dries smooth. It is also a kind option for fine hair, since a low gather needs less grip than a high one. Keep shine spray on the hair only. Sprayed onto the ribbon, it darkens the velvet and can leave patchy marks.
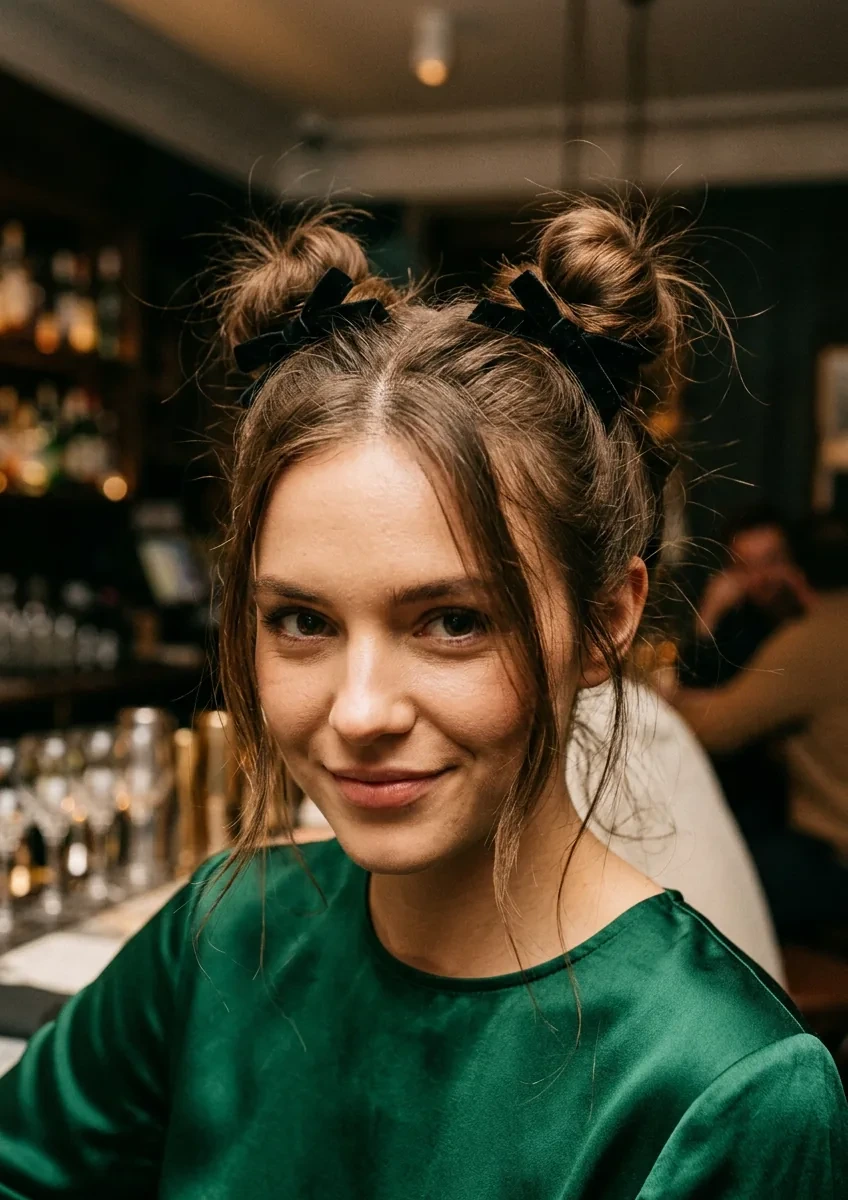
12. Double Mini Buns With Tiny Black Bows
 Pin
A centre parting splits the hair into two high mini buns, each finished with a tiny black velvet bow at its base. The buns are left a little messy, with texture showing, which keeps the pairing playful rather than polished. Keeping each bow near one inch wide is what stops the style tipping into costume.
It flatters rounder faces, since the two high points add height on both sides, and medium length hair works well if the buns stay small. Tuck the ends in fully for a neat finish, or leave them out for a spikier edge. Done right, it is fun, festive, and still completely you.
13. Half Pulled Back Hair With a Brown Bow
 Pin
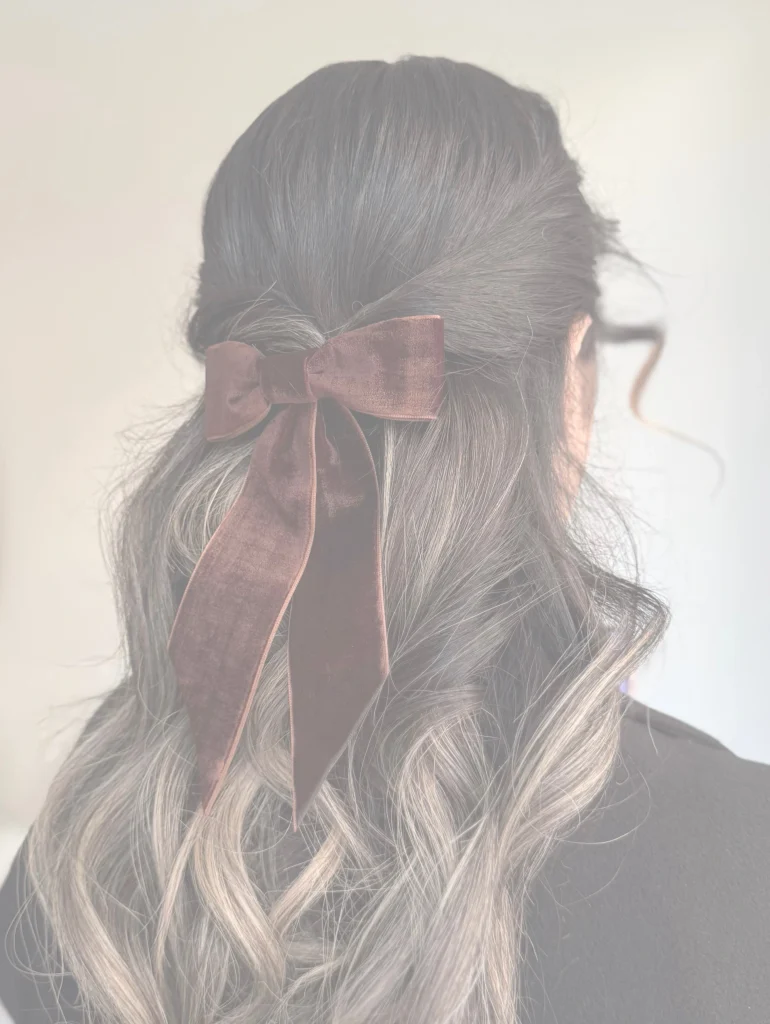
Dark hair with lighter lengths is half pulled back, and a brown velvet bow is fixed low, where the side sections meet. Brown is softer than black against dark hair, so the bow shows through tone rather than hard contrast. The hair below stays loose and falls well past the shoulders in gentle waves.
This flatters most face shapes, and it suits long, thick hair that can fill out a larger bow without the bow looking oversized. Highlighted lengths help the bow stand out as the sections cross behind it. Pin the pulled back sections together before you add the bow. The bow clip alone cannot hold two loose sections in place all evening.
14. Twisted Half Up With a Navy Bow
 Pin
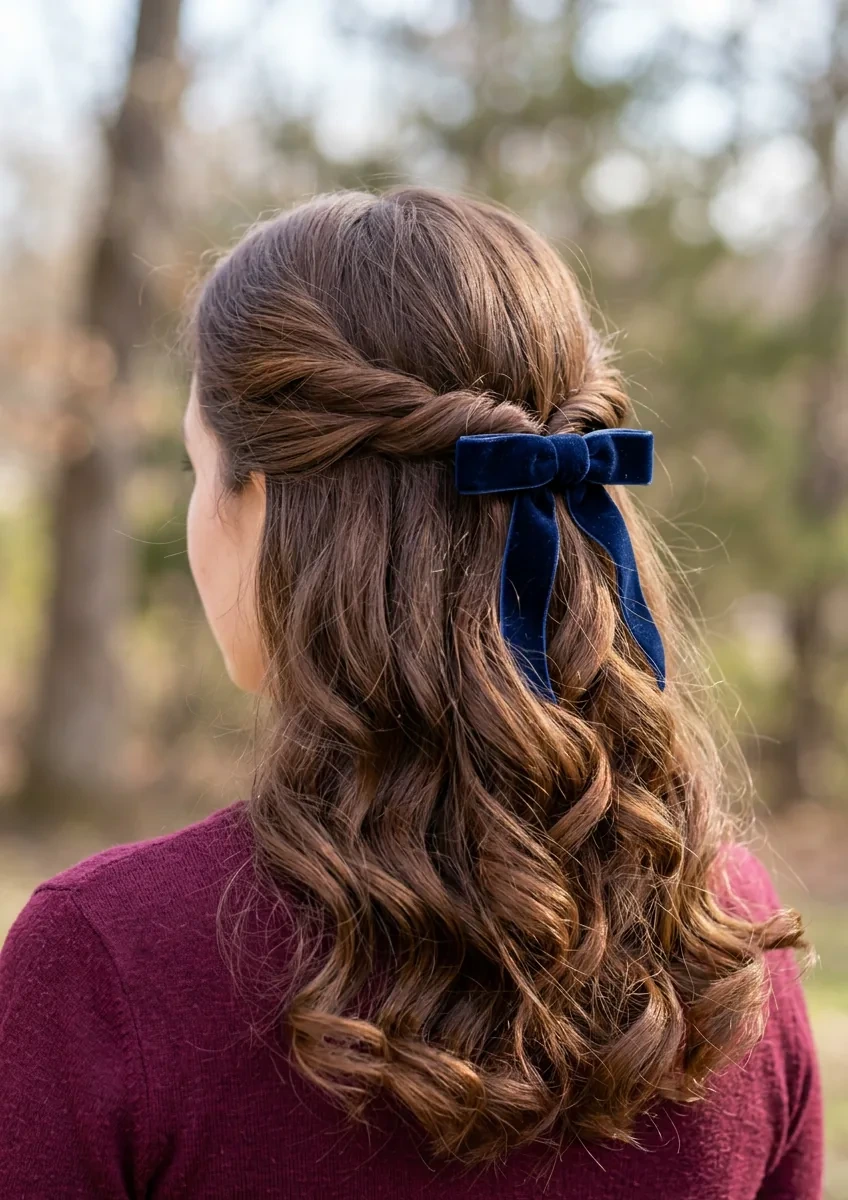
Two one inch sections are taken from each temple, twisted back, crossed over each other, and pinned at the centre, with a medium navy bow placed over the pins. From the front the hair looks soft and full around the face. From the back, the crossover and the bow give the detail that shows in candid shots, while the curled lengths all fall in one direction.
It suits medium and long hair, and fine hair gains the most, because the twists add visible fullness at the crown. Dust a little matte powder along the parting before photos, since camera flash can make a fine parting look shiny. You deserve to look back at the photo and love your hair in it too.
How to Care for Your Velvet Bows and Make Them Last
- Store velvet bows flat and unclipped, away from direct heat, so the pile does not crush on one side.
- Steam a creased bow gently from a distance. Do not iron velvet directly, and do not spray hairspray onto the bow itself.
- Anchor the hairstyle with pins or an elastic first, then add the bow. The bow is a finish, not the structure.
- Dust a little texture powder or dry shampoo where a clip will sit if your hair is fine or freshly washed and slippery.
- Carry one spare bobby pin and a mini elastic. A heavy bow that starts to tilt can be fixed in under a minute.
- Brush loose hair off the velvet with a clean, dry spoolie at the end of the night, and let damp bows air dry before storing.
Velvet Bow Questions, Answered
How do I keep a velvet bow from slipping?
Build the style first with an elastic or bobby pins, then add the bow over the top. A little texture powder where the clip sits, and a clip lined with ribbon or velvet, will hold far better than a bare metal clip on smooth hair.
What size velvet bow should I buy first?
Start with a medium bow, about three to four inches wide, in black. It covers half up styles, low buns, and ponytails. Add a mini pair later for side clips and double buns, and one oversized bow if you love a high bun for parties.
Can short hair wear velvet bow holiday hairstyles?
Yes. Scale the bow down and change the placement. A mini bow above one ear on a deep side part works on a bob or lob, and a small bow can finish a tucked roll at the nape when there is not enough length for a full chignon.
Do velvet bows work on curly hair?
They do, and the matte velvet looks lovely against the shine of curls. Clip the bow where the hair is flattest, such as over a twist or a gathered section, rather than in the middle of loose volume, where it will sink and disappear.
Which bow colours are most useful in December?
Black goes with almost everything, burgundy and forest green read clearly as holiday colours without clashing, and navy is a softer option for photos. Ivory suits winter weddings. One dark neutral plus one festive colour covers most calendars.
How do I stop a large bow looking childish?
Keep the hair smooth and the placement low or to one side, and let the bow be the only accessory. Oversized bows look grown up on sleek buns and low ponytails. They tip into costume when they are paired with loose curls, glitter, and several other accessories at once.
Shortcut Summary
- If you want the fastest party lift: look at Idea 1, the high ponytail with long red tails.
- If you want a Christmas centrepiece: look at Idea 2, the emerald bow with gold pins.
- If you want quiet and elegant: look at Idea 3, the low twisted ponytail, or Idea 11, the sleek low ponytail.
- If you want soft and romantic: look at Idea 4, the side bow in loose waves.
- If you want a wedding guest style: look at Idea 10, the low chignon with the ivory bow placed above it.
- If you want maximum drama: look at Idea 6, the sleek high bun with the oversized black bow.
- If you want an office safe option: look at Idea 7, the smooth half up with a black bow.
- If you want cozy with no heat styling: look at Idea 9, the loose side braid with a green bow.
- If you want playful: look at Idea 12, the double mini buns with tiny bows.
- If you want a photo ready finish: look at Idea 14, the twisted half up with a navy bow.
Final Thoughts
Choosing between these velvet bow holiday hairstyles gets easier if you decide in a set order. Pick the bow placement first, high, low, side, or centre back. Then check that your length can build that shape without extensions or strain. Colour comes last, and it is the easiest part to swap on the day.
You do not need a different bow for every event. One medium black bow and one festive colour will cover most of this list, from office parties to Christmas morning. What changes is the hair underneath it, and how smoothly or loosely you wear it.
Before December fills up, save two or three photos from this list and try each style once at home, bow included. Ten minutes of practice now tells you which one holds, which one suits your face, and which one you will actually reach for when you are getting ready in a hurry.